Cloth Covered Spark Plug Wires for a Panhead Duo-Glide
After riding my 1964 Harley-Davidson FLH Duo-Glide with a set of generic black AutoZone wires for a couple of years, I decided it was time to upgrade to a decent set of cloth covered spark plug wires. After looking around, I ordered a red cloth covered wire set from Deadbeat Customs, and the finished result looked much more at home on the motorcycle.
These wires are produced by Lowbrow Customs and come with the spark plug terminals already installed. You just have to cut the wires to length, crimp on the terminals for the coil, and install them. It should be about a 30 minute job if you have the right tools. Here are the steps I followed, which show just how easy it is to install these wires.
For more Panhead electrical and workshop articles, see the Panhead Tech section. If you are refreshing the ignition system, the related 1961–1964 Panhead 12-volt coil upgrade article covers the coil side of the same basic system.

What Comes in the Wire Set
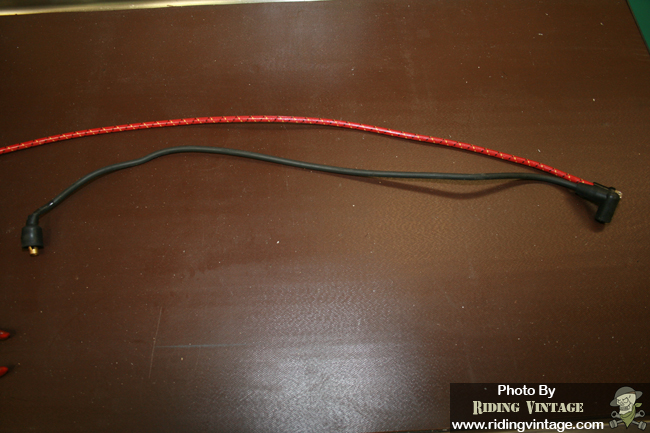
This is what each wire set includes: 4 feet of plug wire with the spark plug terminals already attached, two coil boots, and two coil terminals.

Check out the spark plug terminal. Don't try to grab hold of it while your motorcycle is running.

Step 1: Cut the Wires to Length
Remove your old spark plug wires and use them to cut the new spark plug wire to the proper length. If you are installing these on a new build, I recommend cutting them a little longer than you think you'll need. It is a lot easier to shorten them later and a lot cheaper than buying another set because you cut them too short.
Step 2: Install the Coil Boot First
Slide the coil boot onto the plug wire. You can force the coil boot on later, but you are less likely to damage your new wires if you do it first. A little dish soap is good for lubricating the boot so it will slide down the plug wire easily.

Step 3: Strip the Wire Carefully
These plug wires use a stranded copper core, very similar to the copper wiring used on the rest of your motorcycle. Using a standard wire stripper, strip about 1/2 inch to 3/4 inch of insulation off the end of the plug wire. Make sure to use the proper size stripper so you don't accidentally cut any of the strands of wire. I used a stripper for 10 gauge wire.

Step 4: Fit the Coil Terminal
Bend the exposed copper core over and down alongside the plug wire. Loosely fit the coil terminal onto the end of the plug wire and trim off any excess copper core that sticks out below the terminal.


Step 5: Crimp the Terminal
Crimp the coil terminal onto the end of the plug wire. Make sure that the copper core you bent back during Step 4 is routed down the backside of the coil terminal, away from the open side which is closed in during crimping. I have a crimping tool used for cable TV fittings that works great for this, but you can use a set of pliers if you are careful not to let the crimp get too out of round.

Step 6: Install the Finished Wires
Repeat the above steps for your other plug wire and install the finished plug wires on your motorcycle. At this point you can just sit back and admire your handiwork or, better yet, take your motorcycle out for a test ride.