Harley 32E Generator Rebuild and 2-Brush Conversion
The Harley-Davidson 32E generator was used on V-series models and early Knuckleheads, making it one of the key charging-system components on prewar big twins. This article documents a complete Harley 32E generator rebuild along with a practical 2-brush conversion by Perry Ruiter, showing the brush holders, field coils, armature setup, regulator modification, and final testing.
The 32E began as a 3-brush generator. Converting one to a regulated 2-brush setup gives better charge control for a motorcycle that is actually ridden, especially when using lights or a sealed battery. The goal here is not to change the character of the motorcycle, but to make the charging system more predictable while retaining the early generator appearance.
This article stands on its own inside the VL Tech archive, but it also supports the larger 1933 VL build. Related electrical and control work includes the VL horn button.

The Harley-Davidson V-series engines began using the Model 32E 3-brush generators in 1932. I assumed that I would be using a rebuilt 32E for my build and went about looking for a reputable builder who hopefully could supply me with a completely rebuilt unit as I did not have a core to rebuild from. After a little searching I found out about Perry Ruiter who rebuilds 32E generators up in Canada. I sent him a brief email telling him what I needed and what I wanted to do with the motorcycle and he quickly recommended that I go with one of his rebuilt 32E's that had been converted to a 2-brush model. Perry went the extra mile and not only educated me on the difference between the 3-brush and 2-brush set ups, but also took pictures of the entire rebuild process explaining each step.
Why Convert a 32E Generator to 2-Brush?
So why convert a perfectly good 3-brush generator to a 2-brush? As you can see from the chart below, a 2-brush generator starts to charge earlier, gets up to maximum output faster and the output doesn't drop off as speed increases. Not evident from the chart, one of the main advantages of a 2-brush conversion is that the generator's output is always matched to the demand. If the battery needs a bit of a charge, output increases until it is charged then drops down. When you turn the lights on, output increases, when you turn them off, output drops down. With a 3-brush generator the position of the third brush determines the charge rate and you're stuck with what you've set it to.

The other main advantage to a 2-brush conversion is you can run a sealed battery. You must use a wet battery in a 3-brush system. In a 3-brush system, the battery is responsible for voltage "regulation" (such as it is, the old bulbs are rated 6-8 volts since voltage bounced all over the place). A modern sealed battery needs a well regulated charge rate. This is provided by a modern solid state regulator. You might get away with a sealed battery in a 3-brush system if all you do is run the grand kids around the block once a month, but hop on the bike and run at highways speeds for a day and you'll have destroyed the battery. It's not uncommon for them to actually explode in this situation. They just can't take a charge from a 3-brush system.
Now let's look at the steps Perry takes to rebuild a 32E and convert it to a 2-brush system.
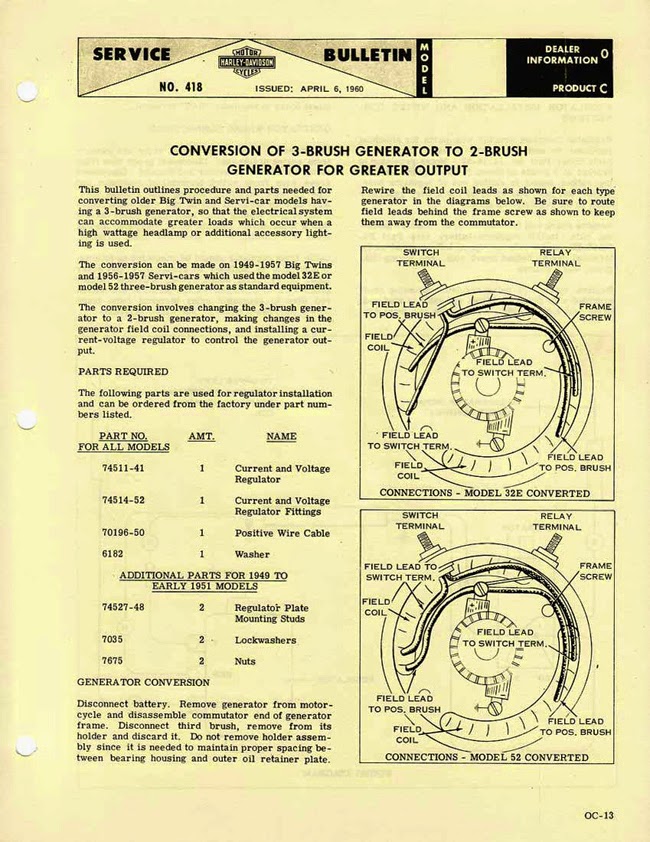
Commutator End Casting and Brush Holders

The generator assembly starts with the commutator end casting and brush holders. Colony's terminal kit is used along with their generator frame screws. Perry swaps out the star washers for parkerized ones and uses custom made brush holder insulating papers which are correct. Fresh cadmium plating, parkerizing and glass beading ensure the appropriate finishes. New fillister head screws, a quality sealed Japanese bearing and a NOS bearing shield washer round things out.

Once the brush holders are installed, Perry checks to ensure the negative brush holder is grounded and that both terminals are isolated from each other and from the end casting, but still have proper continuity with their respective brush holder and terminal. Note that the multimeter is set to ohms for checking continuity/resistance.
The completed commutator end casting assembly is set aside until needed for final assembly.
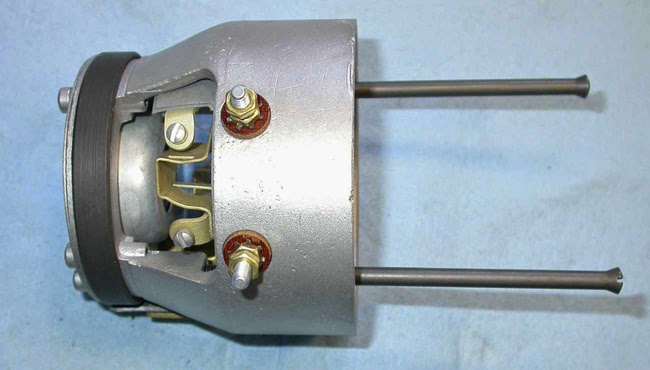
Field Coils, Pole Shoes, and Generator Body

Here is the generator body with field coils and pole shoes. Since we're converting the generator to 2-brush, these field coils are from a 58-64 Panhead generator supplied by Eastern Motorcycle Parts. You can also convert to 2-brush with the stock 32E field coils by changing how they're connected. See Harley Service Bulletin 418 for more details. Pole shoe screws supplied by Colony. Again quality sealed Japanese bearing at the drive end too. Astute readers will note this is a later generator body that takes the neoprene seal. This style body came into use during the last couple years of Knucklehead production and continued on with the Panhead. It results in a nice little upgrade that is invisible when installed.

Since the field coils were originally intended for a later generator, Perry changed the terminals and extended one lead prior to their installation in the 32E body.
Perry snugs up the pole shoes using a Snap-On impact driver with a custom shaped screwdriver tip from Brownells. This lets him get the pole screws dead tight without damage to the screw heads.
Final Generator Assembly
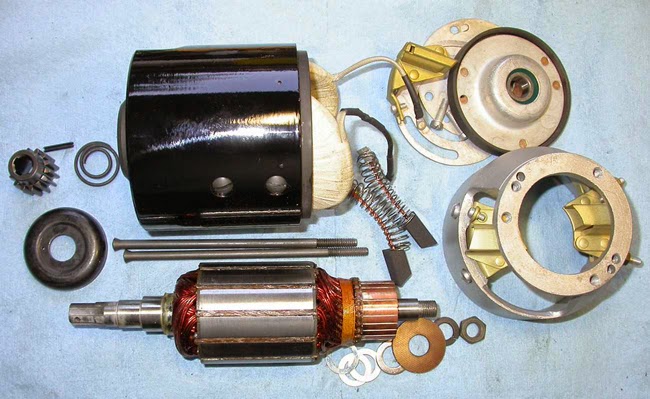
Now the generator is ready for final assembly. The gear, spring and oil deflector are supplied by Eastern Motorcycle Parts. The new brushes and reproduction armature come from Dixie Distributing. Perry made a batch of the armature bakelite washers to ensure they are the correct size.

When installing the roll pin in the gear, Perry uses a custom made bench block to support the armature and to ensure that it is not accidentally bent when the roll pin is driven in. Note that most reproduction gears have a 3mm rather than a 1/8 inch hole. To compensate Perry uses 3mm roll pins. Perry says, "You can't drive a 1/8 roll pin into a 3mm hole!" In the above photo, you can also see how Perry parkerizes the generator body prior to painting. This helps keep rust at bay should the generator get a scratch or a rock chip.
Motoring and Polarizing the Generator

Once the generator is fully assembled a battery is hooked up to motor it. The generator should motor in a counter-clockwise direction when observed from the gear end. If it rotates the other way you have your field coil leads reversed. Motoring does two things, it verifies that the generator is assembled properly and provides an initial polarization for the pole shoes. The generator relies on residual magnetism in the pole shoes for initial excitement each time the engine is started.
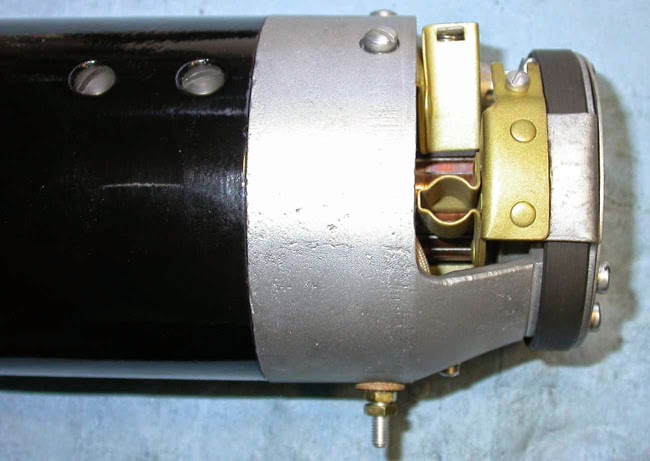
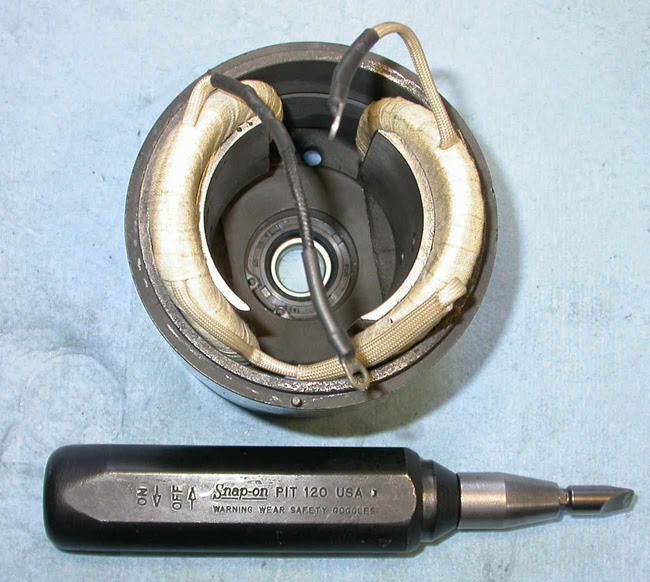
Recall we converted the 32E from being a 3-brush generator to a 2-brush generator. In the photo above you can see that the third brush holder sits empty in the assembled generator.
Regulator Conversion and Load Testing

Since the generator has been converted to 2-brush, a regulator is required. The natural choice is a solid state Vtronic 6V regulator supplied by RetroCycle (also available in 12V). Unfortunately the manufacturer only supplies this unit in a 38 to 57 three post style. Perry has developed a modification of the Vtronic unit to give it a two post outward appearance which is correct for the VL series. The third post is hidden on the underside.
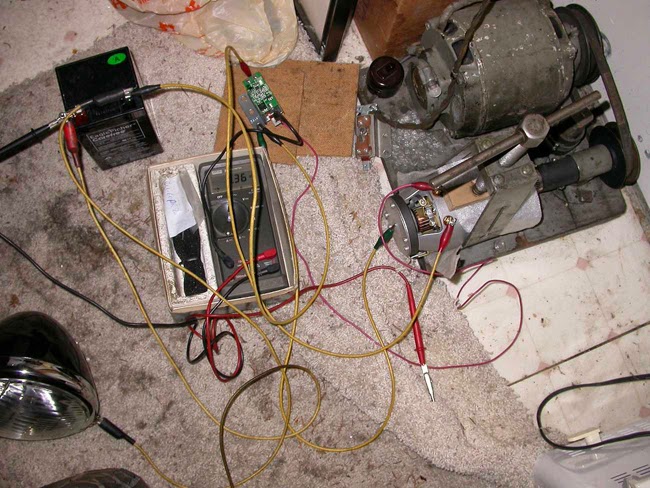
Although he has a Sun generator/alternator test bench, Perry has a strange affection for this ancient generator tester rescued from an old Harley dealer years ago. The generator support is a piston pin push tool. Here the generator is being run at speed to verify that it and the regulator are working together as they should. A Cycleray headlight, just visible on the lower left, is periodically hooked up to provide a load and verify that the regulator and generator respond to the increased demand and then drop back down when it is removed. All of these tests are performed using a multimeter to accurately measure changes in the generator's output. The meter is set to amps for this test.
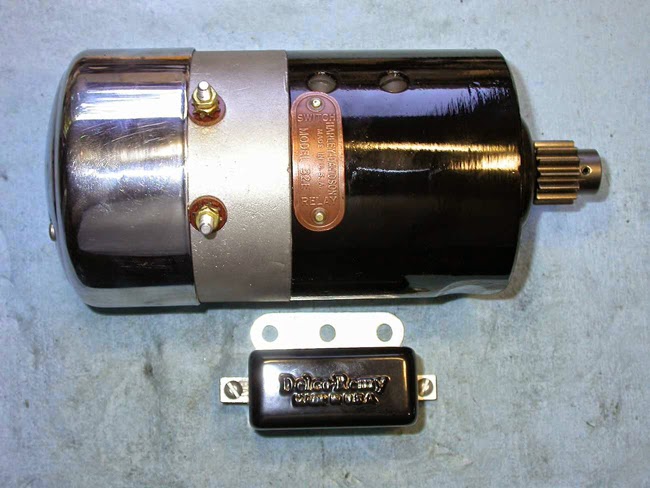
To finish things out, Perry added a cover on the regulator, a nice old original tag and a period aftermarket chrome cover to complete the generator. The duo is now ready to provide many miles of trusty service.
Parts Used
Colony Machine
30012-32 Generator Screws
2126-12 Terminal Kit
9520-4 Pole Screws
Eastern Motorcycle Parts
A-31035-31 Oil Deflector
A-31070-30 Generator Gear
A-31040-31 Spring
E-1007 Field Coils
Retrocycle
0478506 Vtronic 6Volt Regulator
Dixie Distributing - 937 322 0033
Brushes
Armature